
Epoxy is well known for being a versatile and durable material, but it is a lesser-known fact that it owes much of its strength and adhesive properties to its intricate curing process. In order to achieve the level of resilience that people expect from epoxy flooring, it is important to ensure that it cures properly.
Epoxy curing is a multi-step process in which individual substances are combined and distinct layers are applied to create a solid, continuous flooring solution that is suitable for almost any use.
Epoxy Curing Process
Before we discuss the epoxy curing process, we first need to take a look at the individual components of the epoxy mixture.
Chemical Composition
Epoxy is made up of two fundamental components: epoxy resin and hardener. Epoxy resin consists of long chains of molecules that contain multiple epoxy groups (epoxide functional groups), and these chains form the basis of epoxy’s liquid state.
The hardener, which is typically a polyamine compound, contains amino groups that are highly reactive and can readily form chemical bonds with the resin’s epoxy groups.
Chemical Reaction
The epoxy curing process starts when the resin and the hardener are mixed in the correct proportions. When the two substances are combined, a chemical reaction known as polymerization or “cross-linking” takes place.
The precise proportions of epoxy and hardener are extremely important because this ensures that each epoxy group within the resin will find a corresponding amino group in the hardener, which allows them to form a strong chemical bond.
Formation of Crosslinks
As the chemicals within the mixture react, they form chains that hold the epoxy material together in a dense network. This results in a resilient and solid structure with exceptional mechanical strength, rigidity, and resistance to distortion. These crosslinks are what make epoxy’s ability to withstand heavy loads, impacts, and wear and tear possible.
Application Process
The application process for epoxy takes place over the course of a few days, and it takes a few separate layers to finalize this flooring system.
Primer
Before pouring the epoxy, the surface will generally need to be treated with an epoxy primer. This helps to ensure that a strong adhesive bond is formed between the epoxy and the underlying material.
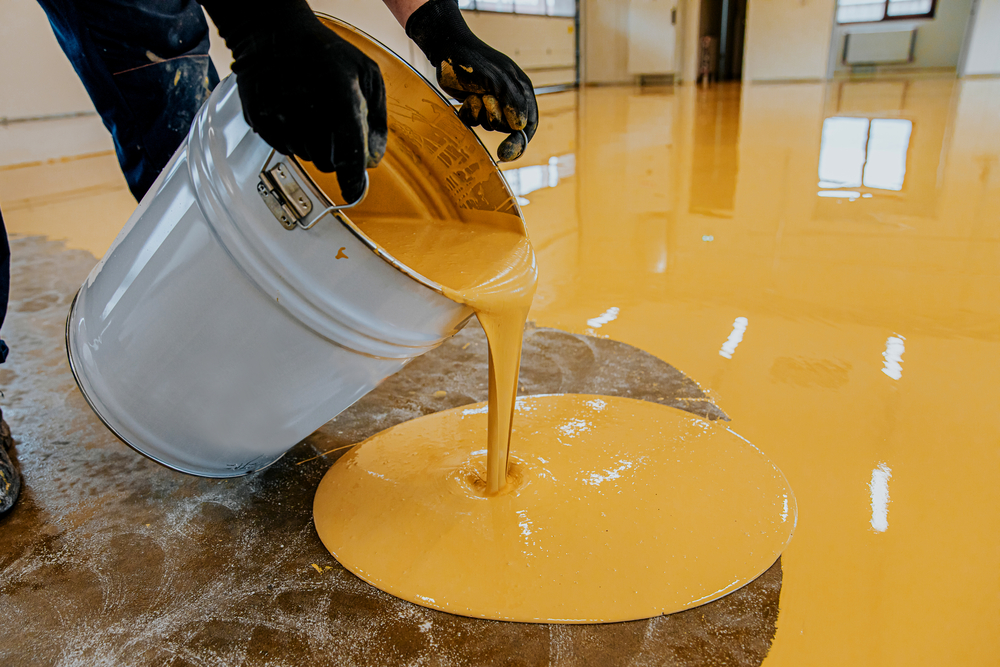
Epoxy
Once the primer has completely dried, the first layer of epoxy can be poured. After the mixture is thoroughly combined, the epoxy flooring crew will disperse the material across the floor’s surface with a few different types of tools, including rollers, brushes, and squeegees.
After completely covering the entire surface with the epoxy mixture, it will need to dry overnight. The flooring crew will typically come back in less than 24 hours to remove bubbles that have formed in the epoxy surface as gasses escape from the concrete below.
This time frame is important because after 24 hours, the epoxy will have almost completely cured. After this point, it requires a much more significant effort to remove bubbles and imperfections from the epoxy’s surface.
Clear Coat
This is the final step for installing an epoxy floor, and it’s what gives this type of flooring its glossy appearance. After removing any imperfections from the epoxy, the installation crew will pour a layer of clear coat to completely cover the epoxy’s surface.
They will often use a gas torch to lightly heat the outer layer of the epoxy flooring, which will pop any bubbles as they rise to the surface. This ensures that the epoxy curing results in a clean, smooth, and consistent surface.
Excel Concrete Coatings
Here at Excel Concrete Coatings, we take a tremendous amount of pride in our work and the results we provide to our customers. That’s why our mission is to provide the best products and services possible in the concrete coating industry.
If you are looking for a versatile and durable flooring solution that will last for years to come, then call Excel Concrete Coatings for a free quote!
Greg Beebe owns Excel Concrete Coating, a concrete coating company based outside of Milwaukee, Wisconsin.